RGUI is a uncomplicated born GUI for RetroArch. Information technology was originally introduced in the Wii port of RetroArch in club to provide the console experience, where everything is controlled from a joypad. RGUI was later refitted for PC and mobile ports.

Features
While RGUI cannot configure absolutely everything, information technology can do the almost common things yous would want to do while using RetroArch.
- Selecting libretro core
- Load a game
- Tweak per-libretro core options (e.g. colorization in GameBoy)
- Load game from history (previous games played)
- Salve/load savestates
- Configure shaders
- Configure attribute ratios
- Configure integer scale
- Toggle fullscreen
- Swap disk images (needed for PlayStation, run across notes below!)
- Accept screenshots
- Enable/disable real-time rewind
- Simple input configuration
- Mute/unmute audio
- Get out RetroArch
Config file
By default, RetroArch looks for a config in various places depending on OS:
- Linux/OSX:
$XDG_CONFIG_HOME/retroarch/retroarch.cfg, and so~/.config/retroarch/retroarch.cfg, so~/.retroarch.cfg, and finally, as a fallback,/etc/retroarch.cfg. - Windows:
retroarch.cfgin same folder asretroarch.exe, then%APPDATA%\retroarch.cfg.
To override this, employ retroarch --config customconfig.cfg. If yous have some special options you want to shop in separate config files yous tin can apply retroarch --config baseconfig.cfg --appendconfig specialconfig.cfg. See man-page and/or --help for item.
Alert
While you are changing settings in runtime, they are not saved to disk afterwards on PC by default. If you want RetroArch to automatically write dorsum the config, either gear up config_save_on_exit = truthful in config, or enable this under Settings -> Config Save On Go out from within RGUI.
Past design, the config file is considered immutable as it is likely maintained by the user, and should not be overwritten behind the users dorsum. This is not the case on consoles however, where looking at the config manually isn't really an selection for most users.
- By default on PC, the F1 button volition enter the carte du jour.
- To exit the carte du jour, use F1 or
Resume Game. - To start immediately in RGUI without whatever game or core loaded, apply the
--cartecommand line option. As a special case, if no arguments are received, it is treated the aforementioned as runningretroarch --card.
Menu toggle push button can exist mapped to a controller as well, see option input_menu_toggle option in retroarch.cfg.
RGUI is controlled like whatever other libretro core. Regular input binds will utilize, and binds here are defined in terms of the RetroPad, RetroArch'due south joypad abstraction.
- A push button (Default PC: 10): Have/OK
- B button (Default PC: Z): Back/Cancel
- Start (Default PC: Return): Get to main settings menu
- Select (Default PC: Right shift): Prepare a setting to default
- Up/Downwardly D-pad (Default PC: Upward/Down keys): Browse settings/files
- Left/Right D-pad (Default PC: Left/Correct keys): Toggle settings, or browse several items at once in file browser.
Searching through lists with keyboard
When using a keyboard, it tin can be irksome to navigate a large list using gamepad-like controls. To help this, you lot tin can blazon / (forward slash) at any time to bring upward a search-box. Type a search string and hit render. The cursor should spring to the first entry that matches. The search volition match mid-path strings. However, if a match is found at the offset of the path, like when searching for commencement letter, the showtime-of-path lucifer will accept priority.
The forward slash is recognized on character basis, not on the key itself. This allows due east.g. norwegian layouts to type forward slash using shift + 7. Characters which are outside the ASCII set are recognized simply ignored as RGUI cannot return such characters anyways.
Thumbnails
RGUI thumbnail support requires the use of playlist files and thumbnail image packs, every bit described in ROMs, Playlists, and Thumbnails.
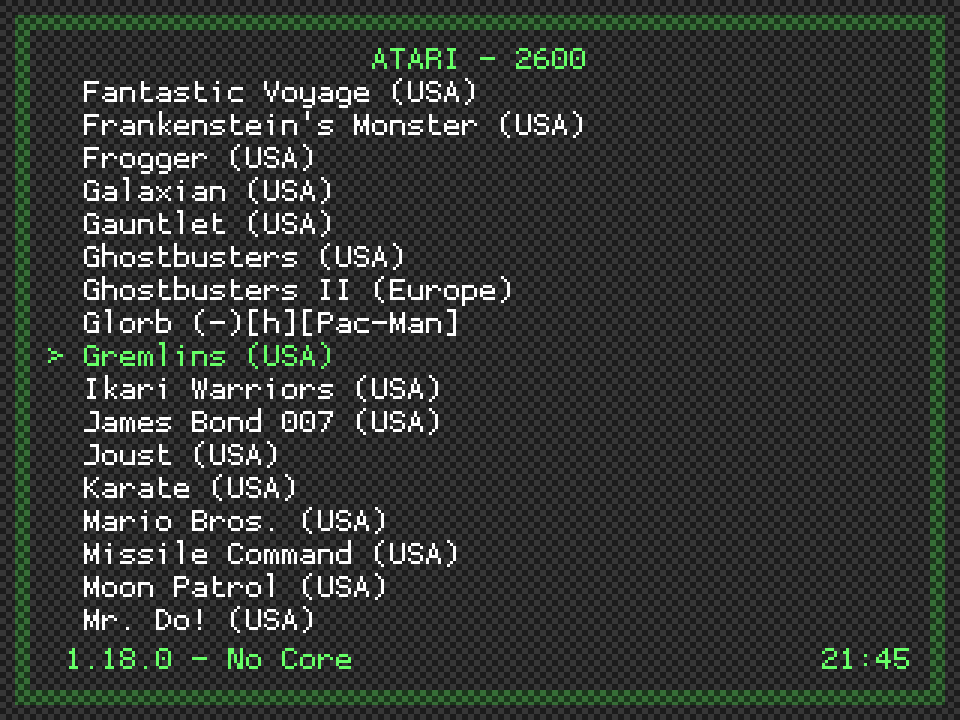
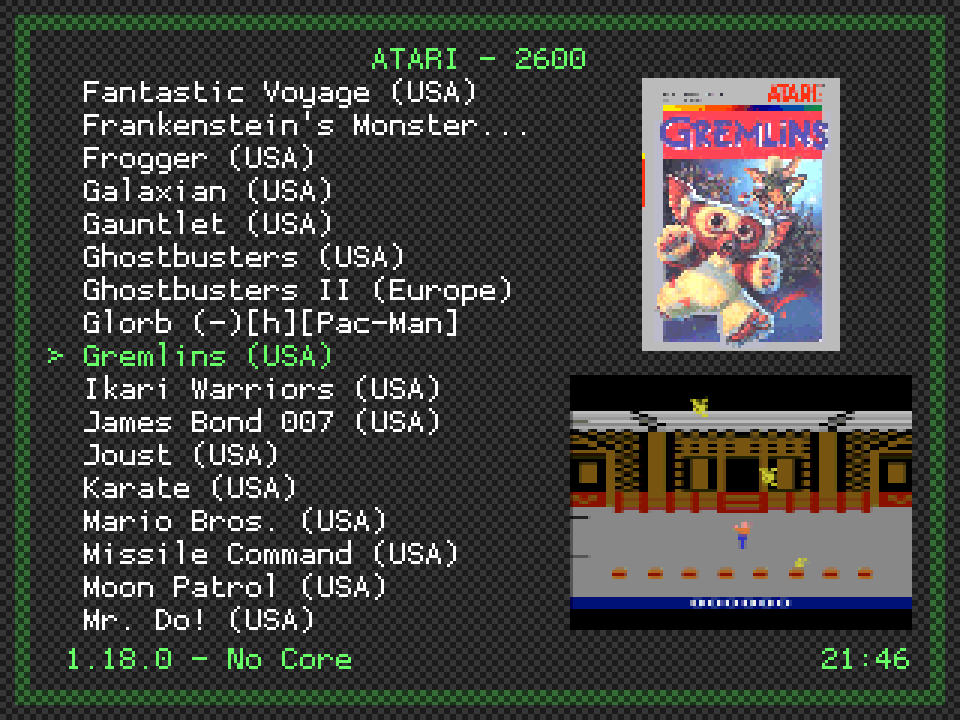
To view existing playlists choose Load Content from the top menu, so Collections. Select a playlist, and while browsing its contents use the RetroPad Y button to toggle the display of the thumbnail associated with the currently highlighted entry:
Thumbnails off:
Thumbnails on:
Note that information technology is possible to navigate up and down through a playlist while thumbnails are being shown.
To choose which type of thumbnail will exist displayed, from the top menu select Settings > User Interface > Appearance and gear up the Thumbnails choice to i of:
-
Screenshots
-
Title Screens
-
Boxarts
Any thumbnail image larger than 320x240 will be downscaled automatically to fit the screen. Three downscaling methods are provided, allowing a choice betwixt performance and quality. To switch between them, from the height menu select Settings > User Interface > Appearance and set up the Thumbnail Downscaling Method selection to ane of:
-
Nearest Neighbour (Fast): Simple (pixelated) nearest neighbour scaling. Has a very low impact on performance, and should exist usable on any hardware.
-
Bilinear: Smooth (although potentially blurry) resampling. Slower than nearest neighbour, but should be usable on most hardware.
-
Sinc/Lanczos3 (Slow): High quality resampling (although sometimes generates artefacts when source paradigm contains dithering). May crusade lag on very low terminate devices, but has no discernable operation impact on desktop-course hardware.
Starting a game
- To load a game yous need a libretro core to use, and a ROM.
- Selecting
Cadrefrom top carte, you can browse for a libretro implementation. - Where the browser starts depends on your
libretro_pathconfig. - If blank, it volition outset in root (dull to browse). If
libretro_pathis a directory, RGUI will employ that as top binder. Iflibretro_pathis a full path, it will first in the folder where the file is.
After loading a libretro core, you will see the proper noun and version of the core in lower part of screen. Yous can then browse for a ROM with Load Game. To control where RGUI starts to browse for roms, gear up rgui_browser_directory in config. If not set, it'll start in root.
The browser will filter out extensions for the last core set in Cadre, and use that core when a ROM is loaded. If libretro_path in config is gear up with a total path to a cadre, this core is automatically selected in one case RGUI boots upward (but you tin can still change the cadre afterwards).
Applying shaders
Run across the shaders user guide.
Configuring input
Currently you tin can configure two settings per player (on PC):
- Device: Picks which gamepad to use for actor N. The name of the pad is available.
- Device Blazon: Picks which device type to use. This is relevant for the libretro core itself, and mostly useful for PlayStation, which needs to know if you're using a DualAnalog device or not.
Configuring controller input
Configuring controller input is supported from inside RGUI.
Normal gameplay binds likewise as RGUI hotkey bounden is supported. It is possible to bind everything in succession for convenience.
Configuring keyboard input
Configuring keyboard input is currently non supported. To configure keyboard binds, it must be done exterior RGUI.
PlayStation disk swapping
Some PlayStation games require disk swapping. To manage disks, libretro has a concept of a disk index (like a multi-disk CD player, call back those? :P). If a PlayStation core is loaded, Disk Index and Disk Image Append options are added to chief carte.
In Beetle PSX, multi-CD images are typically handled with an .m3u playlist. In this instance, you can bandy disks past cycling through the Disk Index setting. If you don't or tin can't utilize a playlist, you tin can suspend a disk image on the fly using Disk Image Suspend. In this example, yous browse for a disk epitome and append it to the internal deejay epitome listing. The Disk Index is updated appropriately and y'all are returned to the game.
Workarounds
Replacing the disk within RGUI is "physically" speaking the aforementioned as ejecting, swapping disks and closing the tray instantaneously. Some games volition not work with this approach, notably Metal Gear Solid because they demand to discover an actual eject taking place.
To work around this, set Disk Index to No Disk, and exit RGUI. The game will option up that the tray has been ejected/missing disk after half a second or so. Now y'all can go back to RGUI, pick the correct disk index and render to the game.
Themes
The visual advent of RGUI may contradistinct past choosing i of 32 inbuilt color themes. From the tiptop menu select Settings > User Interface > Advent and cycle through the various Menu Color Theme options:

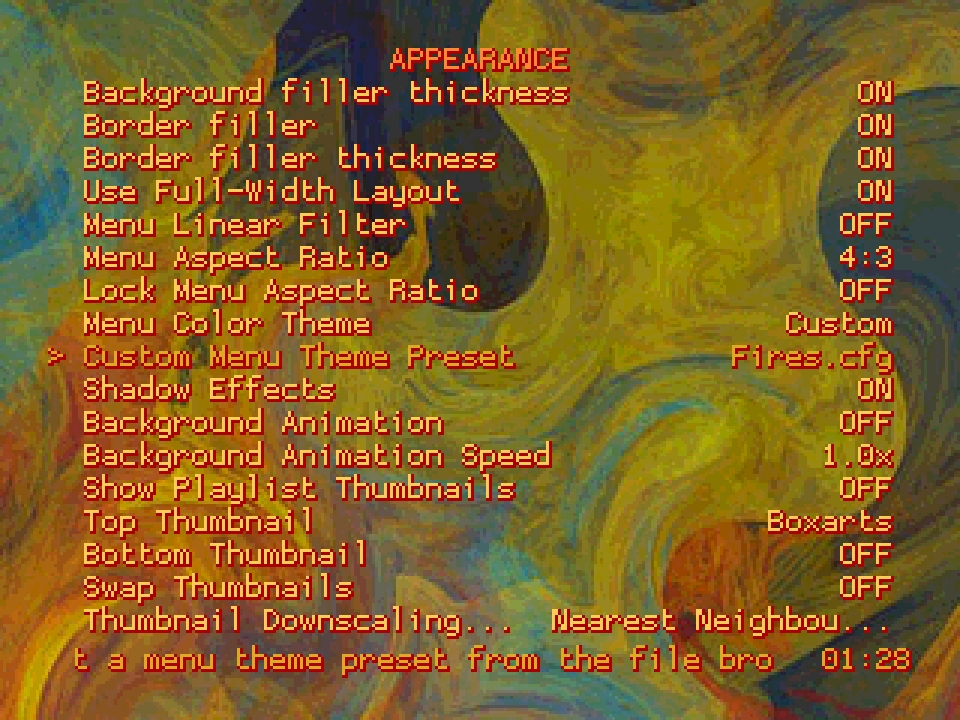
Setting Carte Color Theme to Custom allows for an fifty-fifty greater degree of personalisation via the utilize of custom menu theme presets. A number of examples are provided in the RetroArch assets package, which may be downloaded by selecting from the top menu Online Updater > Update Assets. To choose one of these examples, go to Settings > User Interface > Advent and select the Custom Card Theme Preset selection. In the file browser that opens, navigate to the rgui directory and select a .cfg file.
A custom bill of fare theme preset is a plainly text configuration file (eastward.thousand. my_theme.cfg) with the following contents:
|
-
rgui_entry_normal_color: Specifies the color of all 'normal' text displayed in any list.
-
rgui_entry_hover_color: Specifies the color of the currently selected entry, along with the cadre proper name and clock displayed at the bottom of the screen.
-
rgui_bg_dark/light_color: Specifies the menu groundwork color. Setting
rgui_bg_dark_colorandrgui_bg_light_colorto different values creates a chequerboard result. Also used for the groundwork of message boxes, and the title text when displaying thumbnails. -
rgui_border_dark/light_color: Specifies the colour of the border 'frame' fatigued around the perimeter of the menu. Setting
rgui_border_dark_colorandrgui_border_light_colorto different values creates a chequerboard consequence. Also used for the frame of bulletin boxes. -
rgui_wallpaper: The relative file path to an optional wallpaper image. If this entry is omitted or left empty, no wallpaper is used.
Color Selection
All colour values are given in 0xAARRGGBB viii-digit hex code format - i.due east. the kickoff two digits represent to the alpha (transparency) value, while the remaining 6 are a normal hex triplet. For example: fully opaque red would correspond to 0xFFFF0000; 50% transparent light-green would stand for (approximately) to 0x7F00FF00.
For maximum legibility, the blastoff value for all text colors should exist set to FF (fully opaque). For the background and border, setting partial transparency allows the currently loaded content to be seen 'through' the carte when opening information technology while running a game. Note, however, that setting partial transparency causes colors to appear darker than expected, so careful tuning of the hex triplet values is required. Appropriate transparency values are every bit follows:
-
When creating a dark theme without wallpaper, the border/bg alpha component should be ready to
C0. -
When creating a light theme without wallpaper, the border/bg alpha component should exist set up to
E0. -
When creating a theme with wallpaper, the edge/bg alpha component should be set up to
FF. (This is because it is very difficult to create a semi-transparent wallpaper image with proper colors, and so it is almost practical to make everything fully opaque when using wallpapers)
Creating Wallpaper Images
RGUI wallpapers must have the following properties:
-
A resolution of exactly 320x240.
-
A color depth of 4 bits per pixel. (This is non strictly required, but using an paradigm with greater color depth volition not produce expected results)
Wallpapers should exist generated in PNG format.
To produce a suitable image, the user should beginning create a regular 320x240 PNG file via whatsoever means at their disposal. Inkscape users may find the following unproblematic template beneficial: rgui_wallpaper_template.svg
Once the prototype is consummate, information technology is necessary to reduce its colour depth. This may be done via one of 2 methods:
i) pngquant (recommended):
pngquant is a control-line utility for lossy compression of PNG files. It supports very high quality conversion of images to indexed color, in a fashion appropriate for well-nigh kinds of wallpaper.
Download/compile/install the latest version, then use the following command to procedure a wallpaper source file:
|
Open the output WALLPAPER_NAME_indexed.png file and check that colors/gradients appear right. In most cases, the result will be agreeable. If odd 'speckles' are credible, it may be necessary to adjust the colors in the source paradigm (this is a blackness art, and beyond the scope of this document). If the image has unacceptable, uncorrectable dithering then the WALLPAPER_NAME_indexed.png file should be discarded, and the following alternate method used instead:
ii) GIMP:
GIMP is a well known epitome editor. In general information technology produces lower quality color reduction than pngquant, simply it can handle certain gradients and patterns that cause pngquant to stumble. Download/install the latest version, then:
-
Open the wallpaper source file
-
From the bill of fare, select
Image > Way > Indexed... -
In the
Indexed Colour Conversionpopular-up, select:-
Generate optimum palette -
Maximum number of colors:16 -
Color dithering:EITHERFloyd-Steinberg (normal)ORFloyd-Steinberg (reduced color bleeding(use whichever looks best, but the other options here will not work) -
Press
Catechumen
-
-
Inspect the outcome. Some transmission touch-up may be required. (If the image is disagreeable at this stage, and then the wallpaper probably isn't going to work - so start over...)
-
If all is well, select from the carte
File > Consign As...and name the fileWALLPAPER_NAME_indexed.png -
In the
Export Image as PNGpop-upwards, untickSave color values from transparent pixelsand clickExport
Whether pngquant or GIMP is used to create WALLPAPER_NAME_indexed.png, a terminal stage of optimisation should exist applied to generate a 'clean' output wallpaper. This can be done using OptiPNG. Download/compile/install the latest version, and so run the following control:
|
Edit the custom carte du jour theme preset configuration file such that rgui_wallpaper points to the resultant WALLPAPER_NAME.png image. Once appropriate text/background/edge colors have been set, the theme is consummate.
Final update: 2021-07-12
DOWNLOAD HERE
Posted by: finleyregive.blogspot.com